
满足亚麻针迹:冬季项目的完美模式
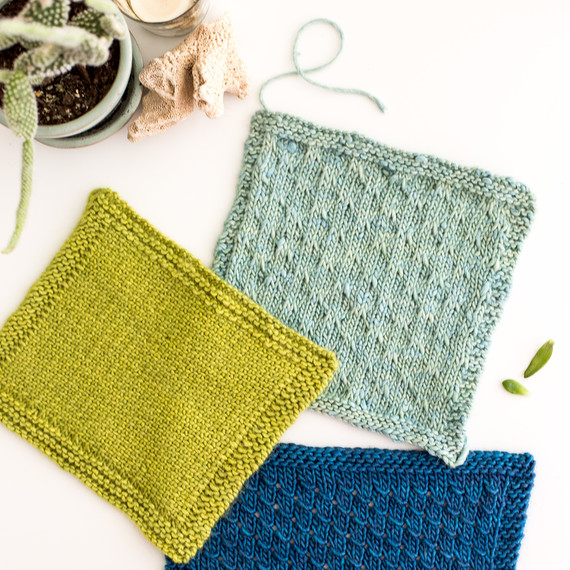
我喜欢在针织中使用不同针脚,亚麻针脚是我的最爱之一。它看起来坚固而美观。亚麻针脚非常适合保暖或更硬的面料。如果你正在寻找一些简单,免费的亚麻针迹图案,我在这篇文章的末尾包含了我最喜欢的一些链接.
一旦你开始尝试不同的针迹图案,你就会上瘾。我在尝试任何新针迹时的建议是制作一个完整的样品(6 x 6英寸),这样你就可以真正感受到图案,它是如何悬挂的,并了解它的真实尺寸。如果应用于喜爱的针织图案,您可能需要相应地调整图案。遵循这些说明很容易,所以不要害怕。潜入并尝试新的东西!
在亚麻针迹中,你每隔一针缝合一次,并在每隔一针缝合(或pur)。同时,您将纱线放在工作右侧的滑动编织针迹前面,或者在工作的错误一侧滑动的purl针迹后面.
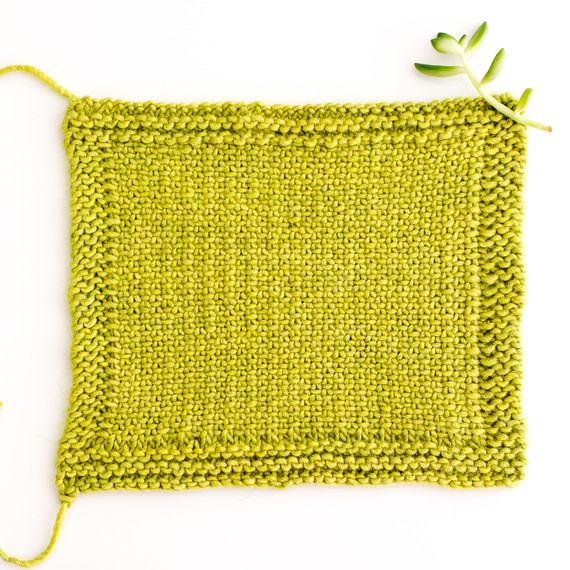
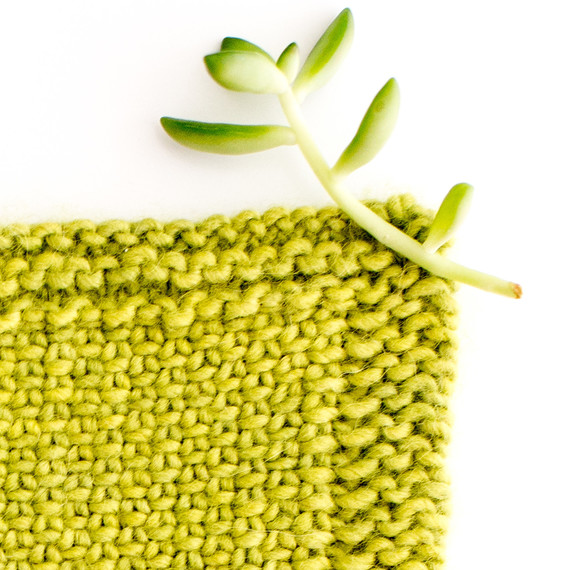
以上是模式的错误一面。我觉得它看起来还很漂亮.
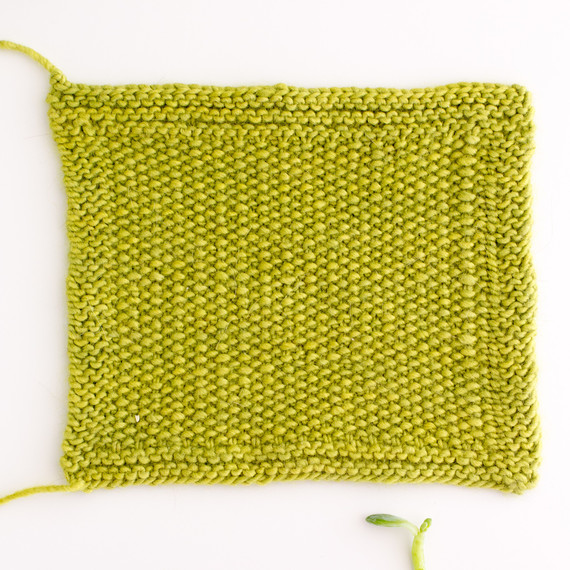
亚麻针迹图案
注意:在偶数针迹上处理此图案。这是一个两行重复.
滑动缝线时,顺滑滑动(针脚在滑针前面,不在后面).
第1行:编织1,*滑1,前面有纱线,针织1;重复从*到结束.
第2行:purl 1,* slip 1,背面有纱线,purl 1;重复从*到结束.
重复这两行以形成模式.
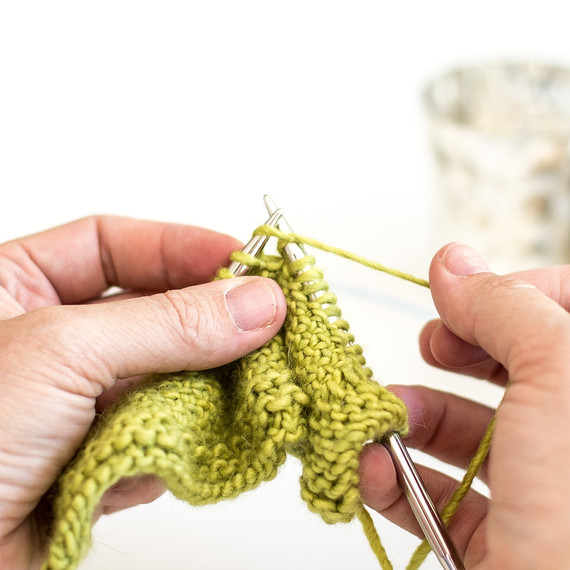
下面,我已经包含带有描述性说明的分步照片,以便您可以准确了解针迹的工作原理。这些并不是要取代上面的说明,而是要澄清它的具体方面。照片不显示图案的第一行。步骤的动作在第一行中是相同的,但你不会看到下面一行中的滑动针迹等.
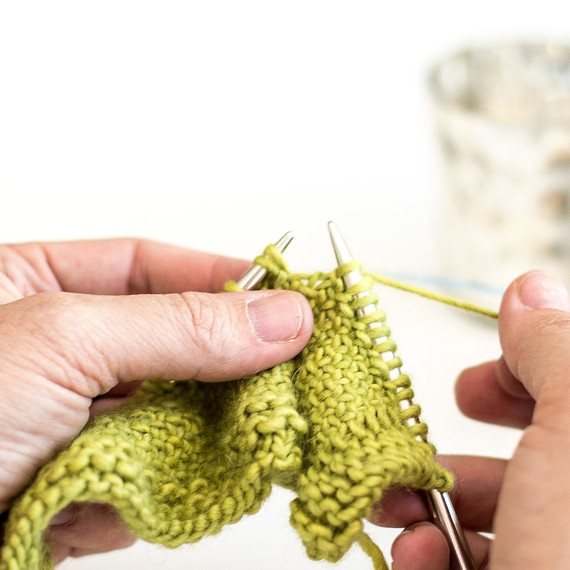
这就是面料从右侧看起来的样子。您可以看到来自前一行的滑动针迹。在这方面,这些是你将要编织的针脚.
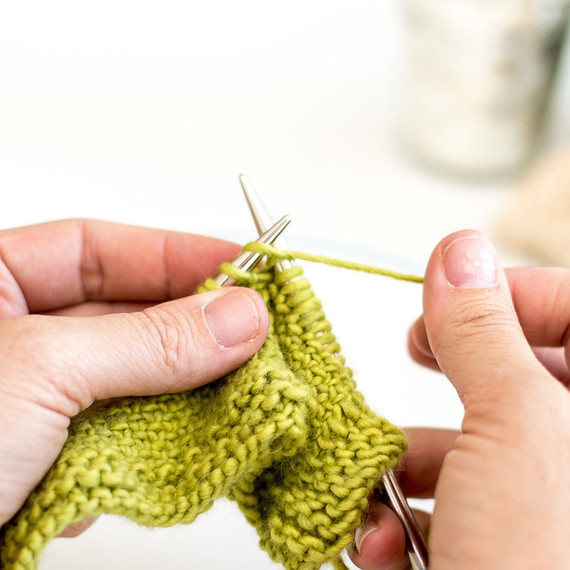
针织一针.
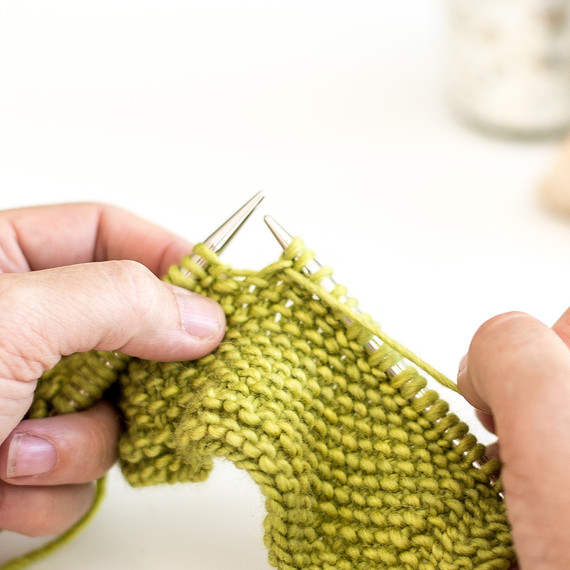
将纱线带到工作的前面.
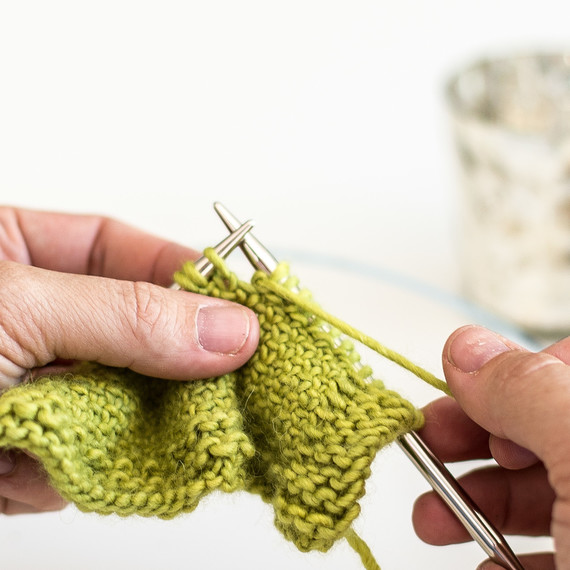
顺利滑动下一针(将右手针放在左手针的前面,而不是后面).
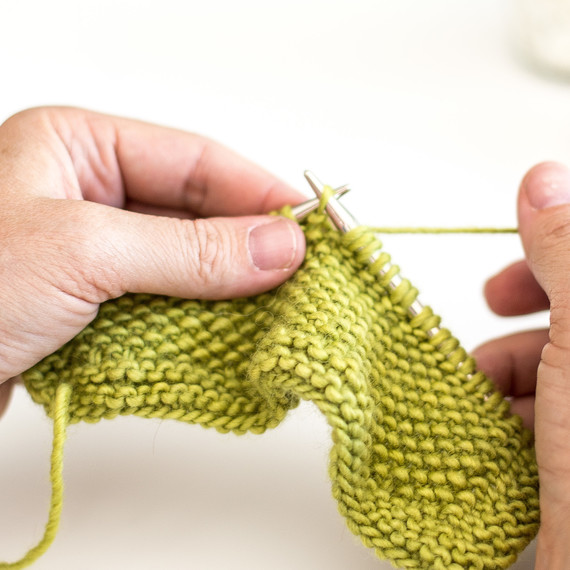
将纱线带到工作的后面.
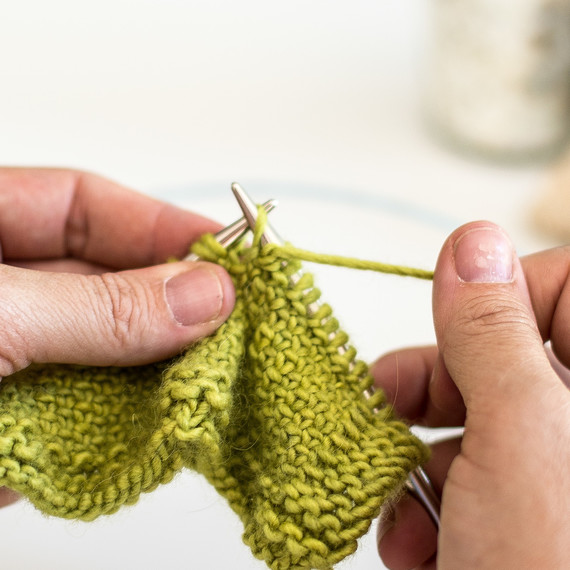
编织下一针。重复这一系列步骤直到结束。转动工作.
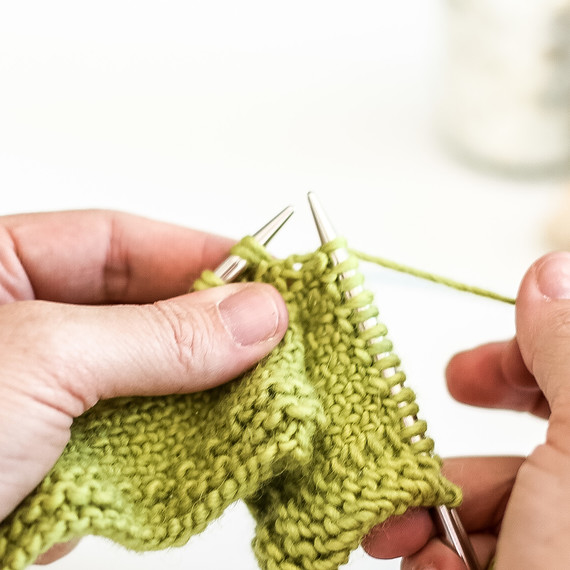
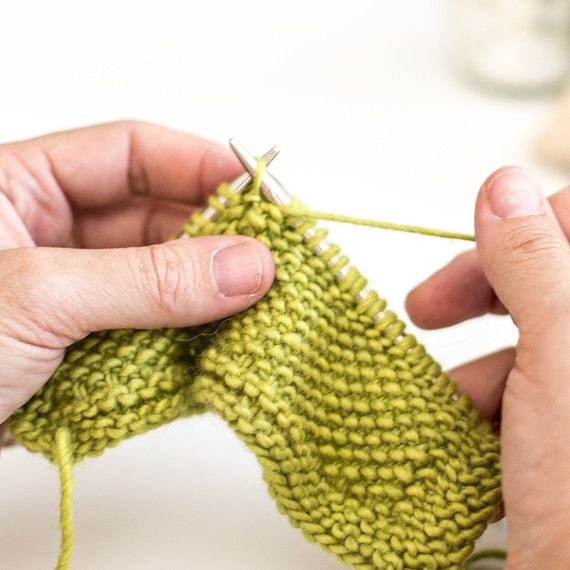
在错误的一面,你完成了一组类似的针迹,除了你正在甩掉在另一侧滑动的针脚并且你将纱线放在工作的背面。 Purl 1针.
将工作纱线带到工作后面并滑动下一针.
将纱线带回工作前部并清洁下一针。重复直到结束.
而已!我希望你能为你新买的针迹图案找到许多新的和可爱的用途!您是否正在寻找一个华丽的项目来尝试您的新针脚?试试这款令人惊艳的色块包裹或这款简单的亚麻针织围巾.
要了解其他美丽的针迹图案,请参阅Anne Weil的个人资料.
27.04.2023 @ 16:21
As an AI language model, I do not have personal preferences or experiences to share. However, I can provide a translation of the text from Chinese to English:
“I like to use different stitches in knitting, and linen stitch is one of my favorites. It looks sturdy and beautiful, and is perfect for warming or harder fabrics. If you are looking for some simple, free linen stitch patterns, I have included some of my favorites at the end of this article. Once you start trying different stitch patterns, you will become addicted. My advice when trying any new stitch is to make a complete sample (6 x 6 inches), so you can really feel the pattern, how it hangs, and understand its true size. If applied to a favorite knitting pattern, you may need to adjust the pattern accordingly. Following these instructions is easy, so dont be afraid. Dive in and try new things!
In linen stitch, you alternate stitching every other stitch and slip every other stitch (or pur). At the same time, you slide the yarn in front of the sliding knit stitch on the right side of the work, or behind the sliding purl stitch on the wrong side of the work. This is the wrong side of the pattern, but I think it still looks pretty.
Linen stitch pattern Note: Handle this pattern on even stitches. This is a two-row repeat. When slipping stitches, slide smoothly (stitches in front of the sliding needle, not behind). Row 1: Knit 1, * slip 1, yarn in front, knit 1; repeat from * to end. Row 2: Purl 1, * slip 1, yarn in back, purl 1; repeat from * to end. Repeat these two rows to form the pattern.
Below, I have included step-by-step photos with descriptive instructions so you can accurately understand how the stitch works. These are not meant to replace the above instructions, but to clarify specific aspects of it. The photos do not show the first row of the pattern. The actions in the steps are the same in the first row, but you will not see the sliding stitches, etc. in the second row.
This is what the fabric looks like from the right side. You can see the sliding stitches from the previous row. In this regard, these are the stitches you will be knitting.
Knit one stitch.
Bring the yarn to the front of the work.
Slide the next stitch smoothly (place the right