
تعرف على Linen Stitch: The Perfect Pattern for Winter Projects
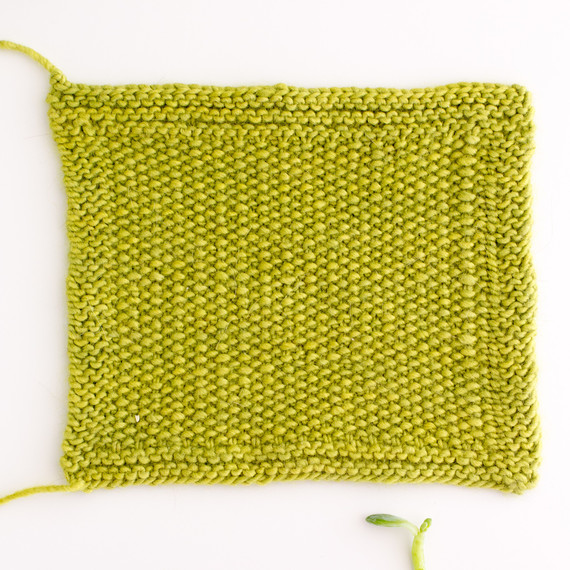
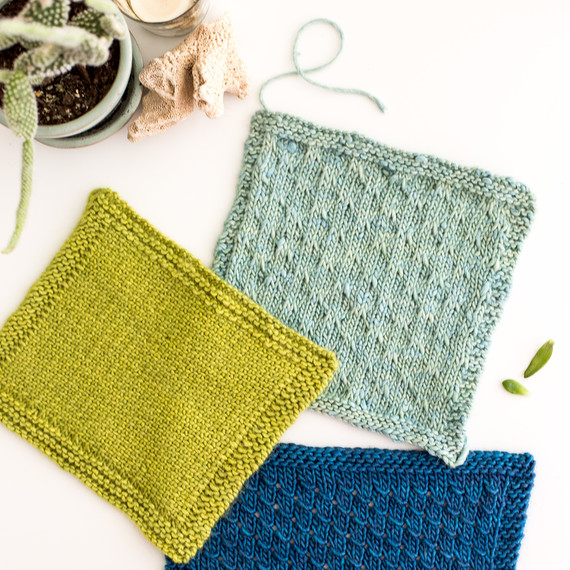
أنا أحب اللعب مع غرز مختلفة في الحياكة ، وغرزة الكتان هي واحدة من المفضلة. انها صلبة وجميلة للنظر في. غرزة الكتان رائعة للدفء أو نسيج أكثر صلابة. إذا كنت تبحث عن بعض أنماط غرزة الكتان بسيطة ومجانية ، فقد قمت بتضمين روابط لبعض من المفضلة في نهاية هذا المنشور.
بمجرد البدء في تجربة أنماط غرزة مختلفة ، سوف تكون مدمن. اقتراح بلدي عند محاولة أي غرزة جديدة هو جعل حامل كامل (6 × 6 بوصات) حتى تتمكن حقا من الحصول على شعور للنمط ، وكيف ستعلق ، وفهم مقياسه الحقيقي. في حالة التقديم على نمط التريكو المفضل ، قد تحتاج إلى ضبط النمط وفقًا لذلك. من السهل جدًا اتباع هذه التعليمات ، لذلك لا تكن خائفًا. الغوص في ومحاولة شيء جديد!
في غرزة الكتان ، تنزلق إلى كل غرزة أخرى وترابط (أو خرير) كل غرزة أخرى. في نفس الوقت ، تحمل خيوط الغزل في الأمام على غرزة متماسكة مائلة على الجانب الأيمن من العمل أو خلف غرزة خرير في الجانب الخاطئ من العمل.
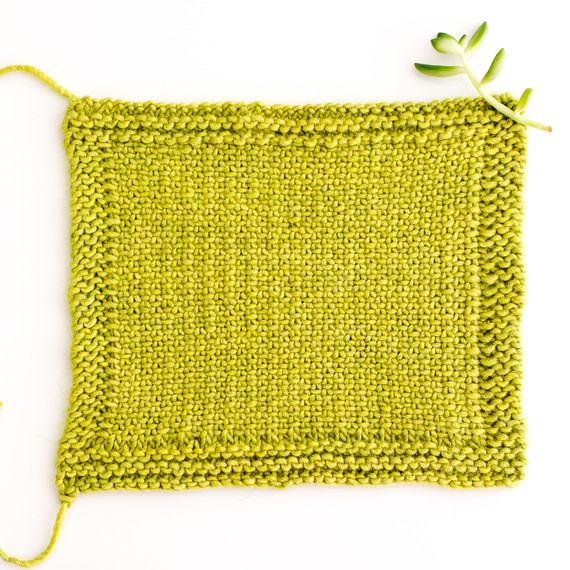
أعلاه هو الجانب الخطأ من النمط. أعتقد أنها لا تزال تبدو جميلة.
نمط الكتان
ملاحظة: يعمل هذا النمط على عدد زوجي من الغرز. إنه تكرار من صفّين.
عند الانزلاق الغرز ، زلة خرير الماء (مع الإبرة أمام غرزة زلة ، وليس وراء).
الصف 1: متماسكة 1 ، * زلة 1 مع خيوط أمامية ، متماسكة 1 ؛ كرر من * إلى النهاية.
الصف 2: خرير الماء 1 ، * الانزلاق 1 مع الغزل في الظهر ، خرير الماء 1 ؛ كرر من * إلى النهاية.
كرر هذين الصفين لتشكيل النمط.
في ما يلي ، قمت بتضمين الصور خطوة بخطوة مع تعليمات وصفية حتى تتمكن من رؤية كيفية عمل الغرز بالضبط. لا يقصد بها استبدال التعليمات أعلاه ولكن لتوضيح جوانب معينة منها. لا تعرض الصور الصف الأول من هذا النمط. إجراءات الخطوات ستكون نفسها في الصف الأول ، لكنك لن ترى الغرز المنزاحة من الصف أدناه ، إلخ..
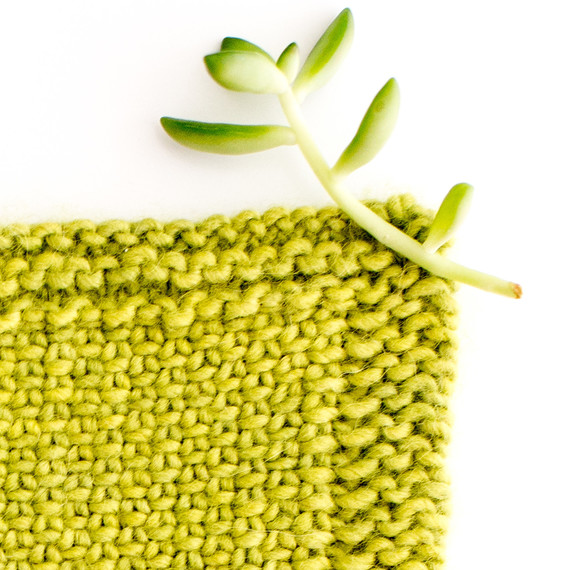
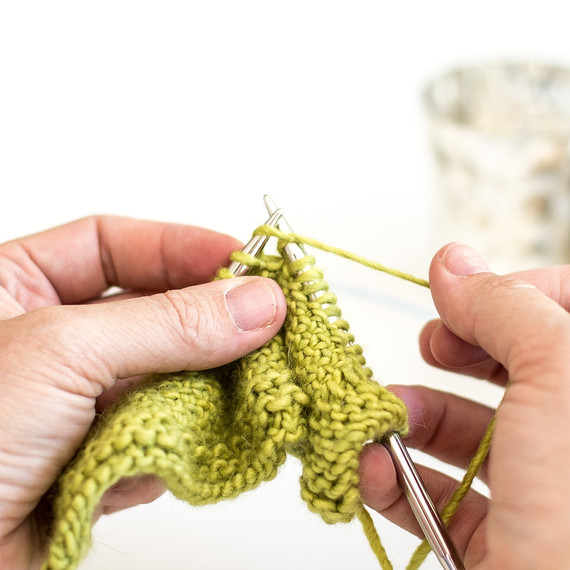
هكذا تبدو النسيج من الجانب الأيمن. يمكنك رؤية غرزة انزلاقية قادمة من الصف السابق. على هذا الجانب من العمل ، هذه هي الغرز التي سوف تكون الحياكة.
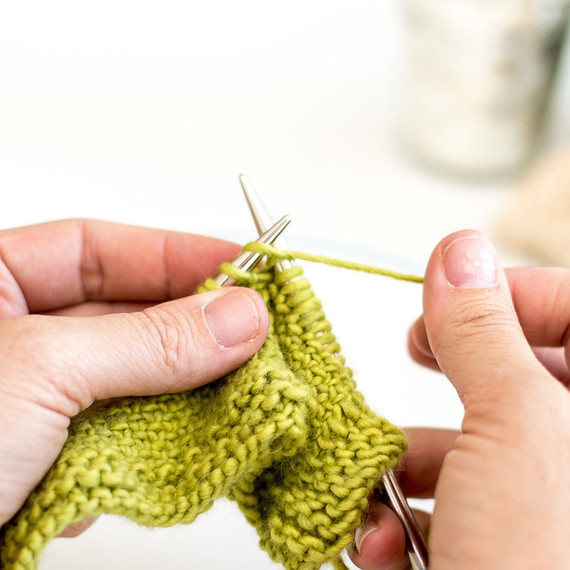
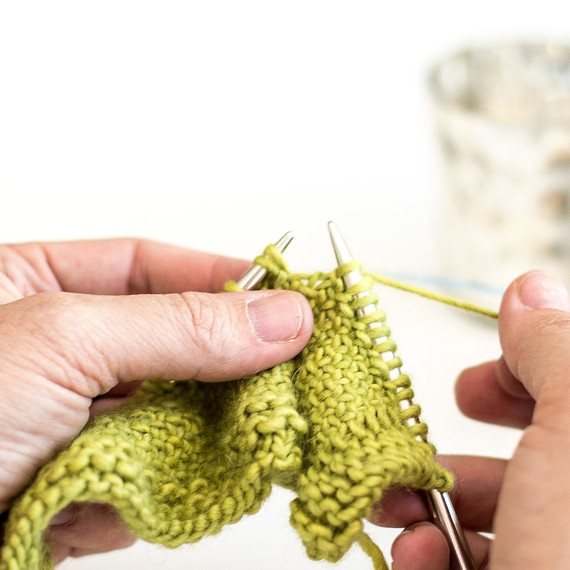
حك واحد غرزة.
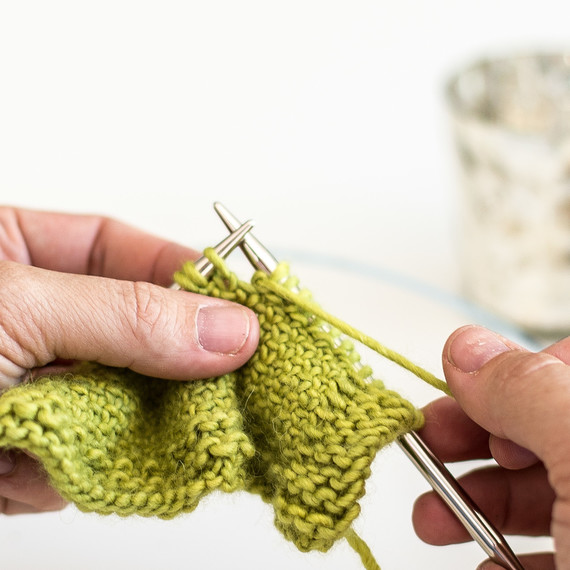
جلب الغزل إلى الجزء الأمامي من العمل.
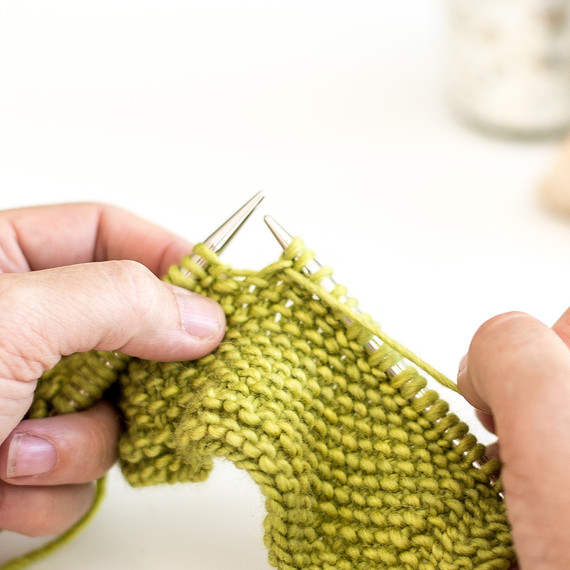
زلة غرزة الحكمة القادمة (جلب إبرة اليد اليمنى إلى الأمام من إبرة اليد اليسرى ، بدلا من الخلف).
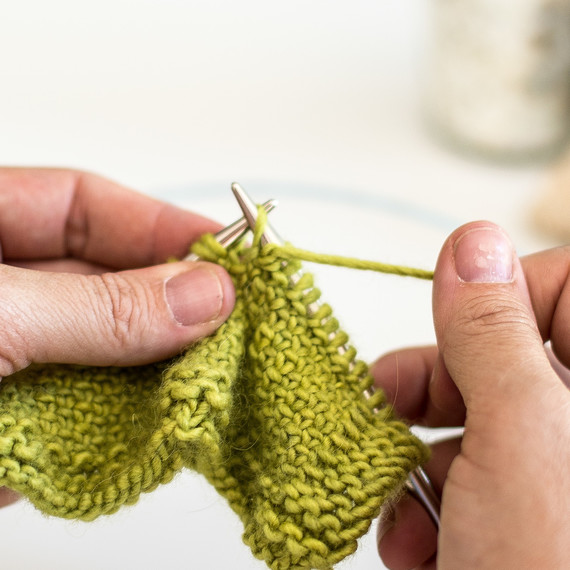
جلب الغزل إلى الجزء الخلفي من العمل.
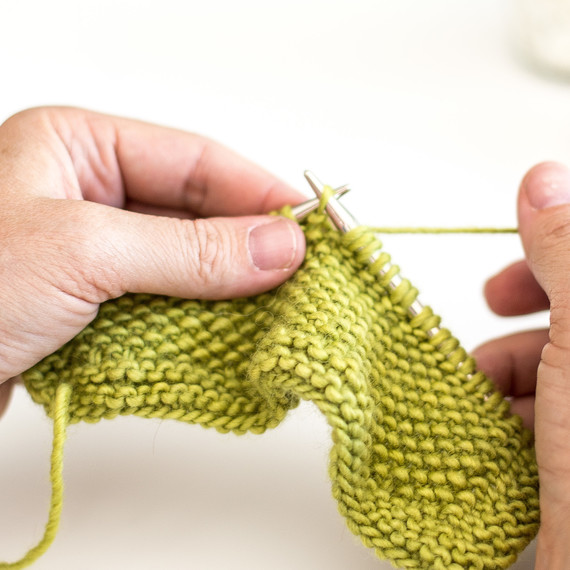
حك غرزة المقبل. كرر هذه السلسلة من الخطوات حتى النهاية. تحويل العمل.
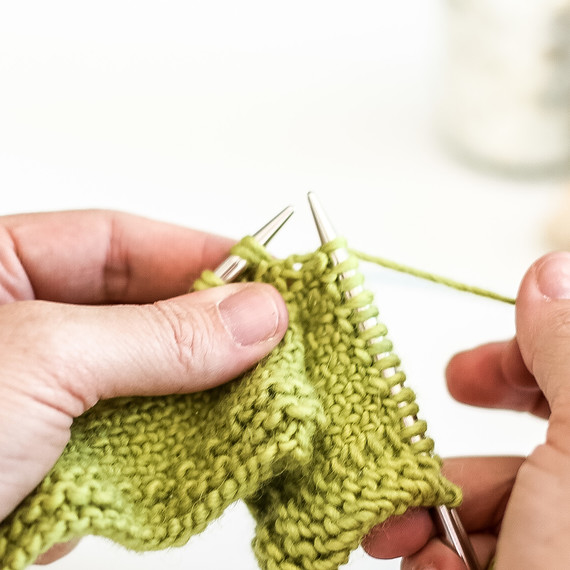
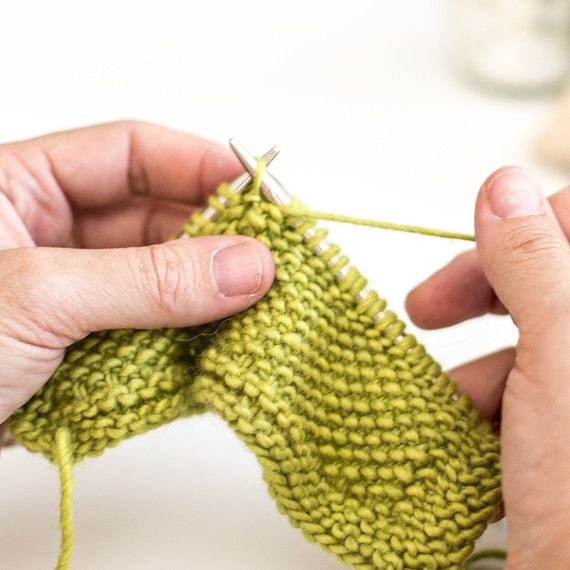
على الجانب الخاطئ ، تقوم بإكمال مجموعة مماثلة من الغرز إلا إذا كنت تنظف غرزة التي كانت قد سقطت على الجانب الآخر وتحمل خيوط على الجزء الخلفي من العمل. خرير 1 غرزة.
جلب الغزل العمل إلى الجزء الخلفي من العمل وتنزلق غرزة المقبل.
جلب الغزل مرة أخرى إلى الجزء الأمامي من العمل وخرير غرز المقبل. كرر حتى النهاية.
هذا هو! أتمنى أن تجد الكثير من الاستخدامات الجديدة والجميلة لنمط الدُسعة المكتسبة حديثًا! هل تبحث عن مشروع رائع لتجربة غرزة جديدة مع؟ جرب هذا الغطاء المذهل بالألوان أو هذا الخيط البسيط من الكتان.
لتعلم أنماط غرزة جميلة أخرى ، انظر الملف الشخصي Anne Weil.
27.04.2023 @ 16:19
I love playing with different stitches in knitting, and the linen stitch is one of my favorites. Its solid and beautiful to look at. The linen stitch is great for warmth or a more sturdy fabric. If youre looking for some simple and free linen stitch patterns, Ive included links to some of my favorites at the end of this post. Once you start experimenting with different stitch patterns, youll be hooked. My suggestion when trying any new stitch is to make a full swatch (6×6 inches) so you can really get a feel for the pattern, how it will hang, and understand its true gauge. If applying to your favorite knitting pattern, you may need to adjust the pattern accordingly. Its very easy to follow these instructions, so dont be afraid. Dive in and try something new!
In the linen stitch, you slip into every other stitch and bind (or slip) every other stitch. At the same time, you hold the yarn in front on a slanted knit stitch on the right side of the work or behind a slipped stitch on the wrong side of the work.
Above is the wrong side of the pattern. I think it still looks beautiful. Note on the linen stitch: this pattern works on an even number of stitches. Its a repeat of two rows. When slipping stitches, slip purlwise (with the needle in front of the slipped stitch, not behind). Row 1: k1, *slip 1 with yarn in front, k1; repeat from * to end. Row 2: slip 1, *slip 1 with yarn in back, slip 1; repeat from * to end. Repeat these two rows to form the pattern.
Below, Ive included step-by-step photos with descriptive instructions so you can see exactly how to work the stitches. Theyre not meant to replace the instructions above but to clarify certain aspects of them. The photos dont show the first row of this pattern. The steps will be the same in the first row, but you wont see the slipped stitches from the row below, etc.
This is what the fabric looks like on the right side. You can see a slipped stitch coming from the previous row. On this side of the work, these are the stitches youll be knitting.
One knit stitch.
Bring the yarn to the front of the work.
Slip the next stitch purlwise (bring the right-hand needle to the front of the left